

Proper tattoo aftercare instructions are the single most important factor in how your new ink will look for years to come. Getting a great tattoo is only half the battle; the real work begins the moment you leave the studio. Your aftercare routine is the final, crucial step in the artistic process.
Why Your Tattoo Aftercare Matters
Think of your new tattoo as a beautiful, open wound. It needs diligent protection to heal correctly, prevent infection, and lock in the sharp lines and vibrant colors the artist intended.
Neglecting this stage can lead to faded ink, blurry details, scarring, or even serious medical complications. Your responsibility is to protect the investment you’ve made in quality artwork.
Following a solid healing plan ensures that your tattoo heals as flawlessly as it looked on day one. This guide cuts through the confusion, offering clear, artist-approved instructions to confidently navigate every stage. We'll cover everything from the initial wrap to long-term preservation for any style, whether it’s American Traditional, delicate fine-line, or intricate Japanese work.
The Artist's Role and Your Responsibility
A professional artist lays the foundation for a brilliant tattoo, but the final result is a partnership. The quality of their work is only as good as the aftercare that follows. Choosing the right artist is the first step, as their expertise includes giving you personalized instructions tailored to your tattoo and skin type. You can learn more about what to look for in our guide to choosing the right tattoo artist at the best Long Island tattoo shops.
Once you leave their chair, the responsibility shifts entirely to you.
A tattoo is a lifelong commitment, and its longevity starts with the first few weeks of healing. Your diligence during this period determines whether the art settles into your skin beautifully or becomes a faded memory of what it could have been.
What This Guide Will Cover
This comprehensive resource is your go-to manual for every question you might have. We break down the entire journey into manageable steps, so you feel empowered rather than overwhelmed.
Here’s a glimpse of what you'll learn:
- Immediate Post-Session Care: What to do in the first critical 24-48 hours.
- Healing Timelines: A day-by-day guide to what’s normal and what’s not.
- Cleaning & Moisturizing: The correct products, frequency, and techniques.
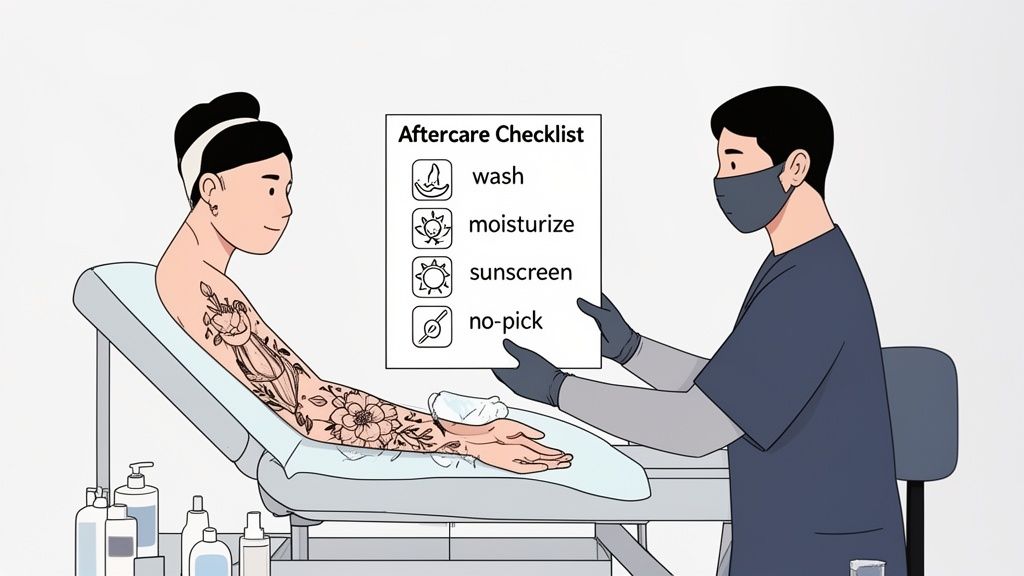
- Essential Dos and Don'ts: A simple checklist to avoid common mistakes.
- Troubleshooting Problems: How to handle issues like infection, scabbing, and itching.
Following these tattoo aftercare instructions is the best way to honor the art and the artist, guaranteeing your piece remains a source of pride for decades.
Immediate Aftercare for the First 48 Hours
The moment you walk out of the tattoo studio, the clock starts on the most critical period of healing. These first 48 hours are absolutely paramount. Your actions during this window set the tone for the entire healing process, directly impacting the final look of your artwork and helping you dodge complications down the road.
That first bandage your artist applies is your tattoo's first line of defense. How you handle it depends entirely on what kind they used—either the traditional absorbent pad and tape or a more modern adhesive film. Listen carefully to your artist's instructions; they chose that specific wrap for a reason, based on your tattoo's size, style, and placement.
Handling a Traditional Wrap
If your artist sent you home with a classic absorbent bandage, its main job is to protect the fresh tattoo for the first few hours. This wrap soaks up the initial weeping of plasma, a little blood, and excess ink, all while shielding it from airborne bacteria.
- Removal Time: You’ll want to keep this bandage on for the exact time your artist recommended, which is usually somewhere between 2 to 5 hours. Leaving it on too long is a bad idea, as it can create a soggy environment perfect for bacteria to throw a party.
- The First Wash: This is one of the most important things you'll do for your new tattoo. Seriously. After you take off the wrap, you need to give it a thorough but gentle wash.
Use lukewarm water and a mild, fragrance-free liquid soap. Lather the soap in your clean hands and gently wash the area with just your fingertips. The goal here is to remove all the slick plasma and any dried blood. If you leave that stuff on, it'll form heavy, thick scabs that can pull out ink. Once it's clean, rinse it completely and pat it dry with a fresh paper towel. Never use a cloth towel, which can harbor bacteria and leave fuzzy lint behind.
Using a Second-Skin Adhesive Bandage
Many artists, myself included, now prefer using a transparent, medical-grade adhesive film. This modern approach, often called "wet healing," creates a protective barrier that’s both waterproof and breathable. It cleverly traps your body’s own healing fluids while locking out contaminants.
This method is a game-changer, especially for intricate designs. At Fountainhead New York, artists like Kyley O'Rourke often recommend these second-skin films for delicate fine-line pieces, advising clients to keep them on for 5-7 days. This approach is proven to slash the risk of contamination while kick-starting the initial healing.
You’re going to see a gnarly-looking buildup of fluid under the film—a soupy mix of plasma, blood, and ink that we call an "ink sack." Don't freak out. This is completely normal and is a key part of the process.
Key Takeaway: Whatever you do, don't panic and try to drain the fluid under a second-skin bandage. That plasma is full of vital healing agents. Unless the seal of the bandage breaks and starts leaking, just leave it alone to do its job.
For those of us using these "wet healing" methods, protective film dressings like Tegaderm Adhesive Patches are a common choice for this initial stage. Your artist will give you precise instructions on how long to leave it on, but it's typically between three and seven days.
The easiest way to remove the film is in the shower. Let warm water run over it for a bit to loosen the adhesive. Then, find an edge and slowly pull the film down and away from the skin, stretching it parallel to your body instead of yanking it straight up. After it's off, you'll follow the exact same washing steps: gentle, fragrance-free soap, lukewarm water, and a clean paper towel to pat dry. Nailing this first cleaning is crucial, and you can get more detailed advice in our guide on how often you should wash a new tattoo.
Navigating The Tattoo Healing Timeline
Knowing what to expect as your new tattoo heals can save you a lot of anxiety. A fresh tattoo is basically a fancy, controlled wound, and your body is going to heal it in a fairly predictable way. Having a roadmap for that process helps you know what's normal and what might be a red flag.
This timeline is your guide through the whole shebang, from that initial "wow, this is sore" feeling to the final, settled-in look of your new art. Understanding what’s coming next means you can give your tattoo exactly what it needs at every stage.
This quick visual breaks down the core aftercare steps—clean, dry, protect—so you can easily remember what to focus on as the weeks go by.
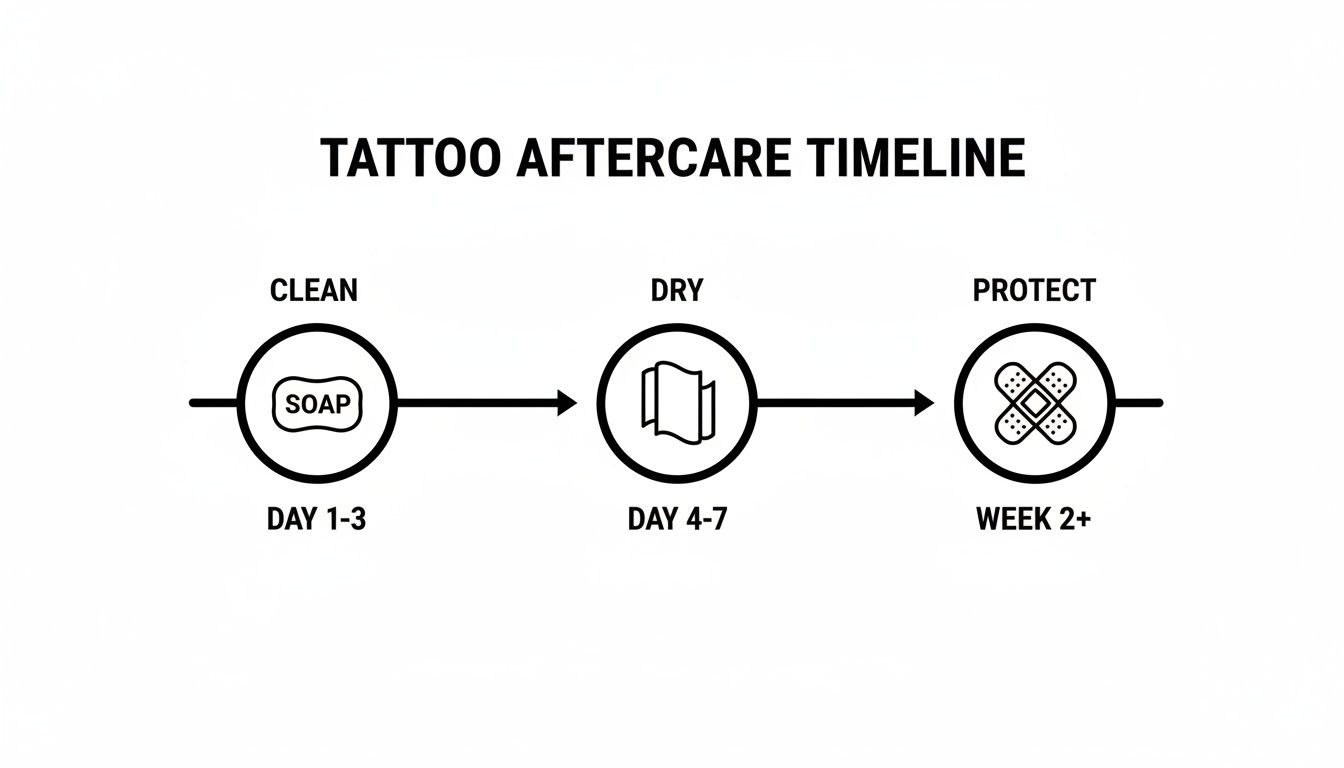
The big takeaway here is how your job changes. At first, it's all about protection and cleaning. Later, you'll shift your focus to gentle moisturizing as the skin starts doing its thing with peeling and regenerating.
To make things even clearer, here's a quick-reference table that lays out what you'll see, what you'll feel, and what you should be doing during each key phase of the healing process.
Tattoo Healing Stages and Aftercare Actions
| Healing Phase (Timeline) | What to Expect | Key Aftercare Action |
|---|---|---|
| Days 1-3 | Looks like a fresh wound. Redness, swelling, tenderness, and oozing plasma/ink. Feels like a bad sunburn. | Gently wash 2-3 times daily with antibacterial soap. Pat dry with a paper towel. No moisturizer. |
| Days 4-7 | The "itch and flake" phase. Tightness, intense itching, and light, flaky skin like a healing sunburn. | Continue washing 2-3 times daily. Introduce a very thin layer of moisturizer after drying. Do not scratch! |
| Week 2 | More significant peeling and light scabbing. Ink-colored flakes of skin will come off. | Reduce washing to 1-2 times daily. Continue with light moisturizing. Let all scabs fall off on their own. |
| Weeks 3-4 | Flaking is done, but the tattoo may look dull, cloudy, or "milky" as the final skin layer settles. | Continue moisturizing once daily to keep the new skin healthy. Be patient as the true colors emerge. |
This table is your cheat sheet, but remember everyone's body heals a bit differently. Now, let's dive into the details of what’s happening at each stage.
Days 1 to 3: The Open Wound Phase
The first few days are all about managing the initial trauma to your skin. Your new tattoo will be tender, red, and swollen—very similar to a bad sunburn. You'll also notice it weeping a clear or ink-colored fluid. That’s just plasma, and it’s your body's natural first step in the healing process.
Your main job right now is keeping it clean. Plan on gently washing the tattoo two to three times a day using lukewarm water and a fragrance-free, antibacterial soap. Afterward, always pat it completely dry with a clean paper towel. Don't slather anything on it just yet; let the tattoo breathe and begin to close up on its own.
Days 4 to 7: The Itch and Flake Phase
Get ready for what is, for most people, the most annoying part of healing. As that top layer of skin dries out, your tattoo will start to get intensely itchy and begin to flake. It’s a lot like a healing sunburn, and the urge to scratch can be overwhelming. You absolutely must resist.
Scratching or picking at the flaking skin is one of the worst things you can do. It can literally pull ink out from the deeper layers of your skin, leaving you with patchy spots and potential scarring. If the itch is driving you crazy, a gentle but firm pat with a clean hand can help take the edge off.
This is when you'll want to start using a moisturizer. After each wash, once the tattoo is bone dry, apply a super thin layer of a fragrance-free lotion or a recommended tattoo aftercare product. The goal is just to keep the skin from feeling tight and cracked, not to smother it. If it looks greasy, you've used too much.
Week 2: The Peeling and Scabbing Phase
That light flaking from the previous stage is about to get more serious. You’ll start to see bigger, ink-colored pieces of skin coming off, especially in the shower or on your clothes. Don't panic! This is completely normal and is just the top layer of dead skin shedding away.
You might also notice some light scabbing, especially over areas with heavy color packing or bold linework. As long as the scabs are thin and you don't see any pus or excessive redness, they’re just part of the process. Keep up the routine of washing and moisturizing one to two times daily, and let every single scab fall off on its own time. Whatever you do, don't pick them.
Weeks 3 to 4: The Final Stretch
By now, all the peeling and scabs should be long gone. But you might look at your tattoo and think it looks a bit… dull. The brand-new layer of skin that has formed over the ink is still settling in, which can give the tattoo a cloudy or "milky" appearance for a little while.
This is a temporary phase, so don't worry. Just keep moisturizing once a day to help that new skin stay healthy and hydrated. Over the next few weeks and even months, that final layer will finish healing, and the true, vibrant colors of your tattoo will finally pop. While the surface looks healed, the deeper layers are still finishing their work. For a complete look at the entire recovery cycle, our guide on how long tattoos take to heal dives even deeper. True, deep-down healing can take a couple of months, so keep being good to your new art.
The Dos And Don'ts of a Healing Tattoo
Think of the next few weeks as the final, most important step of getting your tattoo. Your artist did their part; now it's your turn. How diligent you are right now will directly impact how sharp, vibrant, and incredible your ink looks for the rest of your life.
This isn't about some complicated, time-consuming ritual. It's about building a few simple, consistent habits that give your skin the absolute best environment to heal. Following these rules isn't just for looks—it's about your health. A neglected tattoo is an open invitation for trouble, with studies showing infection risks as high as 20%.
But with a disciplined routine—gentle washing, proper moisturizing, and staying out of the sun—that risk plummets to under 5%. It's a small effort for a massive payoff. If you're interested in the data behind quality products, the global tattoo aftercare products market offers some deeper insights.
The Dos: Your Non-Negotiable Healing Toolkit
These are the simple, straightforward actions that will protect your new art from contamination and damage. Make these habits second nature for the first few weeks, and your tattoo will thank you.
-
Always Wash Your Hands First. Before you even think about touching your tattoo, wash your hands thoroughly with soap and water. Your hands are covered in germs, and a fresh tattoo is essentially a beautiful, open wound. Don't introduce bacteria to it.
-
Pat Dry with Fresh Paper Towels. After washing, always pat the area dry with a clean, disposable paper towel. Your regular bath towel, no matter how fresh from the laundry, can harbor bacteria and shed tiny lint fibers that can get stuck in your healing skin, causing irritation or infection.
-
Apply a Whisper-Thin Layer of Moisturizer. When it's time to moisturize, less is always more. You want just enough of your chosen fragrance-free balm or lotion to give the skin a slight sheen, not a greasy, smothered coating. Your skin needs to breathe to heal properly. Suffocating it will only slow things down.
The Don'ts: The Hard-and-Fast Rules to Follow
What you avoid is just as critical as what you do. Breaking these rules is the fastest way to invite infection, cause fading, and end up with a poorly healed tattoo. Ignore these at your own risk.
The two greatest enemies of a new tattoo are prolonged moisture and direct sunlight. One invites bacteria, and the other degrades the ink before it even has a chance to settle. Protecting your tattoo from both is your top priority.
Submerging your new tattoo is a surefire way to ruin it. Soaking can introduce nasty bacteria from pools, lakes, or even your own bathtub. It also causes scabs to get soft and fall off too early, pulling precious ink out along with them.
Things to Avoid at All Costs:
-
No Soaking. This is non-negotiable. Absolutely no baths, swimming pools, hot tubs, lakes, or oceans for at least three to four weeks. Quick showers are perfectly fine, just don't let the shower spray beat down directly on your new ink.
-
No Direct Sun Exposure. UV rays are kryptonite for tattoos, especially healing ones. Keep your new tattoo completely covered with loose clothing whenever you're outside. Sunscreen is not an option until the tattoo is fully healed; the chemicals can badly irritate the sensitive skin.
-
No Picking or Scratching. As your tattoo heals, it will start to peel and scab, and yes, it will get incredibly itchy. You must resist the urge to scratch or pick at it. Peeling off a scab prematurely will pull ink right out of your skin, leaving you with blank spots and potential scars.
-
No Tight Clothing. Ditch the skinny jeans or tight shirts for a little while. Any clothing that rubs against your new tattoo will cause friction, which can chafe the skin, tear off scabs, and introduce fabric fibers into the area. Stick with loose, breathable fabrics like cotton to let your skin breathe.
Troubleshooting Common Healing Issues
Even with the best aftercare plan, sometimes your body just decides to do its own thing during the healing process. A little bit of redness and soreness is totally normal, but it's critical to know the difference between a standard healing hiccup and a real problem that needs attention. Think of this section as your field guide for navigating those bumps in the road so you can act fast and get your tattoo back on track.
Most new tattoos will feel a bit tender and look angry for the first few days. That's part of the deal. However, some signs are definite red flags that go beyond your typical aftercare routine.
Identifying and Handling an Infection
Let's be clear: a true infection isn't just some minor irritation. It's a medical issue, and it needs a doctor, not just a call to your artist. The key is to watch for symptoms that are getting worse instead of better after the first 48-72 hours.
Keep an eye out for these warning signs:
- Spreading Redness: Some initial redness is expected. But if you see it creeping outwards in streaks or getting darker after day three, that's a problem.
- Pus or Discharge: A healing tattoo might weep some clear or yellowish plasma, which is normal. Thick, green, or opaque yellow pus, especially with a foul smell, is a sure sign of infection.
- Excessive Swelling and Heat: Your tattoo should feel less swollen and hot over time. If it’s still puffy and hot to the touch after a few days, it's time to get it checked out.
- Fever or Chills: If you start feeling sick—running a fever or getting the chills—it could mean the infection is spreading. This is serious, and you need to see a doctor immediately.
Your tattoo artist is an expert in ink, not in medicine. If you even think you have an infection, your first move is to contact a healthcare professional. They're the only ones who can diagnose it properly and prescribe what you need, like antibiotics.
Managing Intense Itching Without Scratching
Ah, the itchy phase. It’s easily the most maddening part of healing a new tattoo. But scratching is the enemy—it can literally pull ink out of your skin and leave you with permanent scars. Luckily, you don't have to just suffer through it.
A cool compress works wonders. Just soak a clean paper towel in cool water, wring it out, and gently lay it over the tattoo for a few minutes. Another pro tip? Gently but firmly pat or slap the area with a clean hand. It sounds weird, but it can trick the nerves into calming down without doing any damage.
Knowing what ingredients can soothe angry skin is also a huge help. For example, looking into mugwort's benefits for calming inflammation can give you a better idea of how certain natural compounds work to reduce irritation.
Dealing With Heavy Scabbing
While some light, flaky peeling is a totally normal part of the process, thick, heavy scabs can be a red flag. They usually form when too much plasma dries on the skin during those first couple of days. These dense scabs can crack easily and often take ink with them when they fall off.
If you end up with heavy scabs, the number one rule is: Do. Not. Pick. The best course of action is to stick with your gentle washing routine and apply a very thin layer of moisturizer. This keeps the scabs from getting too dry and brittle, allowing them to come off on their own when the skin underneath is actually ready.
It's no surprise that a sloppy aftercare routine is the main culprit behind these kinds of problems. In fact, poor aftercare leads to complications in about 10-15% of cases, causing everything from keloids to major fading. A solid routine drops that risk down to just 2-3%. That statistic alone shows just how important it is to resist the urge to pick and to keep your new ink shielded from the sun.
Long-Term Care For A Lifetime Of Vibrant Ink
So, the scabs are gone and the peeling has stopped. You made it through the hardest part. While it might feel like you've crossed the finish line, your tattoo aftercare is really just shifting gears. The healing journey is over, but now the lifelong commitment to keeping that art looking sharp begins.
You’ve successfully navigated the first month, which is huge. But the real test is protecting your investment from its number one enemy over the next few decades: the sun.
Making Sunscreen A Permanent Habit
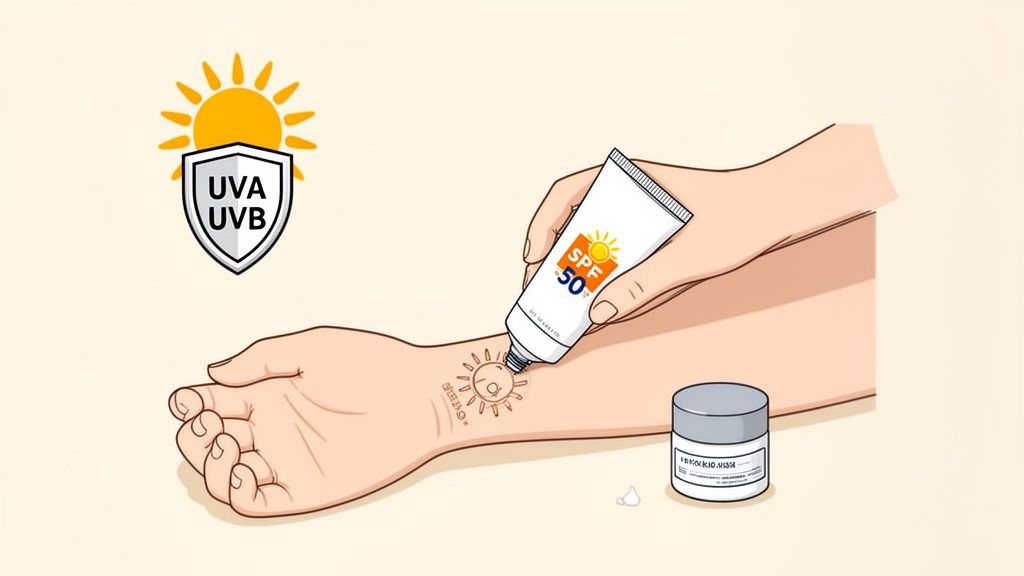
Think of the sun's ultraviolet (UV) radiation as a slow-motion laser constantly working to break down the ink in your skin. Both UVA and UVB rays go deep into the dermis—right where your tattoo ink lives—and start degrading the pigment particles. Over the years, that constant exposure leads to faded colors, blurred lines, and a dull, washed-out look.
The fix is simple, but it demands consistency. Any time a healed tattoo is going to see the sun, applying a quality sunscreen has to become second nature.
Here’s what you should look for in a tattoo-friendly sunscreen:
- High SPF: Don't settle for less than SPF 30. Honestly, SPF 50 or higher is the ideal choice for serious protection.
- Broad-Spectrum Coverage: This is non-negotiable. It means the formula shields you from both the aging effects of UVA rays and the burning effects of UVB rays.
- Mineral-Based Options: Products using zinc oxide or titanium dioxide are fantastic. They create a physical barrier on your skin and are often better tolerated by those with sensitivities.
Sunscreen isn't a "set it and forget it" thing, especially on a long day outdoors. You have to reapply it every couple of hours—and even more often if you’re swimming or sweating. This one habit is the single most powerful thing you can do to keep your art looking crisp for life.
Healthy Skin Means Vibrant Tattoos
Beyond just shielding your tattoo from the sun, the overall health of your skin is a massive factor in how your ink ages. Dry, neglected skin will make even the most brilliant tattoo look tired and faded.
Think of it this way: a well-hydrated canvas reflects light better. This makes your colors look richer and your blacks look deeper and more solid.
You don't need a complicated, 10-step skincare routine. Just get into the habit of using a good, fragrance-free moisturizer daily, especially right after you shower. Healthy skin is resilient skin, and it holds ink with much greater clarity.
When you shift your mindset from short-term healing to long-term maintenance, you become a true collector who knows how to preserve their investment. Proper, lifelong aftercare ensures your story stays vivid and clear for everyone to see.
Common Questions About Tattoo Aftercare
Even with the most detailed instructions, questions always come up during healing. It’s totally normal. Here are some of the most common things we get asked about, answered straight from our years of experience helping clients heal their new ink perfectly.
What Specific Soap And Moisturizer Should I Use?
Keep it simple and gentle. Look for a fragrance-free, antibacterial liquid soap. When it comes to moisturizing, an unscented lotion or a specialized tattoo balm—whatever your artist recommends—is the way to go.
The one thing to absolutely avoid is any petroleum-based product like Vaseline. It’s far too heavy, trapping moisture and bacteria, which can seriously mess with your healing process. Remember, a little goes a long way. You only need a thin layer, just enough to give the skin a slight sheen, not a greasy coat.
Is It Okay To Exercise With A New Tattoo?
It’s best to take it easy for at least the first week. Intense workouts mean heavy sweating, which can irritate the raw skin of your new tattoo. Plus, gyms are breeding grounds for bacteria, and your tattoo is essentially an open wound. You don't want to risk that exposure.
If you absolutely have to get a workout in, stick to light exercise. Make sure to wear loose-fitting clothes that won’t rub or chafe the area, and give the tattoo a gentle cleaning as soon as you’re done.
Why Does My Healing Tattoo Look Faded And Peeling?
This is the phase that freaks everyone out, but it’s a completely normal part of the process. A few days in, your tattoo will start to flake and peel, almost like a sunburn. Underneath that peeling layer, the fresh skin might look cloudy or have a "milky" appearance for a week or two.
Don't panic—this is temporary. That milky look is just the final, thin layer of skin regenerating over your tattoo. Once it’s fully healed, your colors will pop right back to the vibrant, crisp look they had on day one. The golden rule here is to let it peel on its own. Never, ever pick at it.
When Should I Contact My Artist Or A Doctor?
Your artist is your first point of contact for anything related to the normal healing process. If you have questions about scabbing, how much peeling is normal, or which product to use, just shoot them a message. We’ve seen it all and are happy to guide you.
However, you need to contact a doctor immediately if you see any signs of an actual infection. Be on the lookout for things like yellow or green pus, red streaks spreading out from the tattoo, the skin feeling unusually hot to the touch, or if you start running a fever. Those are signs that you need medical attention, not just aftercare advice.
At Fountainhead New York, we believe that a world-class tattoo deserves world-class care from start to finish. If you have any more questions or are ready to plan your next piece with artists who prioritize quality and longevity, visit us at https://fountainheadny.com.


